How to Test in Poser
A small Tutorial for Testers
Page 2
- Now we can load the cloth. Make always sure that you have the figure selected when loading the cloth. Sometimes the cloth consists of more then one item. If the morphs of the cloth are parented to the morphs of the figure they will not work when the figure is not selected when adding the cloth. Again: select the figure, load the first part of the cloth, conform it to the figure. Select a bodypart of the figure and load the second part of the clothes, conform it to the figure. Repeat until all clothes are loaded and conformed.
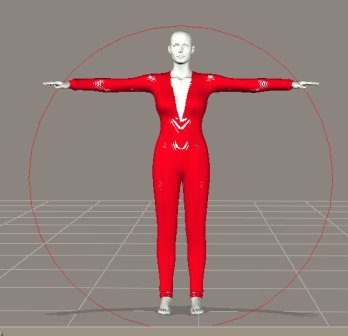
- Your figure will now look somehow like this:
As you can see, there are some white areas shown. This is the first indication for possible pokethroughs.
- Before we look deeper into this, we have to setup our lights. To my experience it is easy. You need a front light and a light on each side. You can do it by yourself or download my Testlights here. Load the Testlights. The Testset has the shadows switched of to increase the render speed.
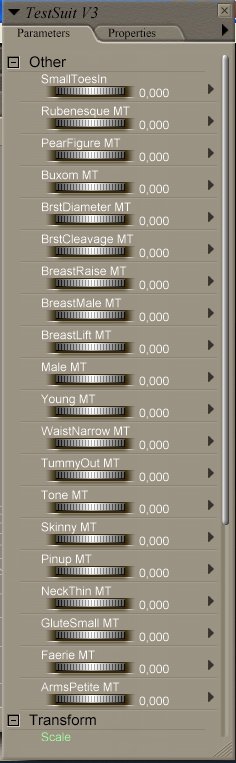
- Now we select the clothes' body. In the parameter dials window we can see all implemented morphs. Make a printout of them, you will need this for further teststeps.
First of all, check if the morphs included in the body are also implemented in all parts of the suit.
Ok, not everything makes sense like Breastsize in the hip but it is your job to check it. Sometimes you will find things like StretchArms in the body but not included into the arms or really things like NipplesBig in the hip.
If you find something like this, write it down.
- Next step is the rendering. To save time, switch to Poser 4 render. This is much faster and for testing OK. Only for special examinations you should use production render settings.
Move the cam so, that the figure is big enough in your preview window. Use only x and z movements for the cam. Never turn around the cam in the y-direction or use the rotation tool. Use here always the yRotate of the figures dials. Start your render. In my example you see the first possible pokethroughs are gone.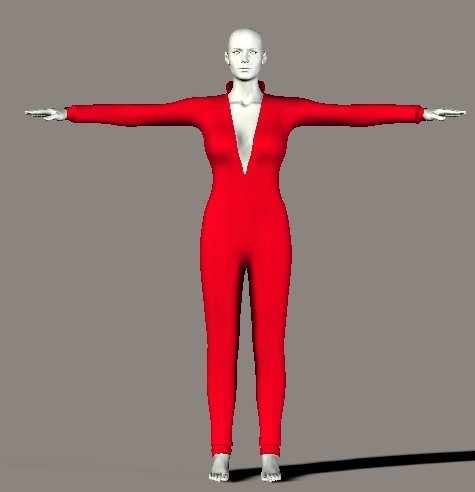
- Next step is to move the figure around. Again, NEVER move the cam. Use the yRotate of the figure to turn around. You should use the following yRotate settings:
- yRotate 0 ° (ctrl + m)
- yRotate 90 °(ctrl + ;)
- yRotate 135 °
- yRotate 180 °
- yRotate 225 °
- yRotate 270 °(ctrl + ')
- xRotate -90 ° (don't forget to reset to 0)
and as last Topview (Ctrl + T)
The shortcuts are only shown for fast change of the view. The figure is only rotated with the yRotate.
If any of these 8 views indicates a pokethrough, you have to make a render. Clothes that are modelled very close to the figure often show pokethroughs in the preview mode. Normally they disappear but it's your job to prove that. If you find something, write it down and also it is helpfull to save the render. A pic often explains more then 1,000 words.
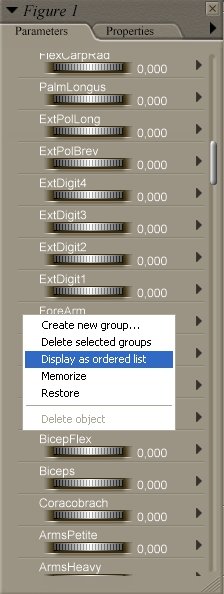
- After this first inspection we will start with the morphs. Just a hint from my side, make the bodymorphs of your figure as an ordered list.
Just a rightclick on the parameter dials and display as ordered list. Now you have the Bodymorphs together and you don't have to search through the mess.
Look at your printout of the bodymorphs and now you have to go through the list one by one and make the inspection as shown under 11.
Now you can check the possible time for the next steps. If you have only 10 morphs you have 80 additional views and possibly 80 renders. Depending on your experience and the speed of your PC you have to estimate for this 80 to 120 minutes.
So, before continuing, check your stock for coffee, coke, cigarettes and sweets ;)
Copyright©: Ulrich Hoffmann 2006