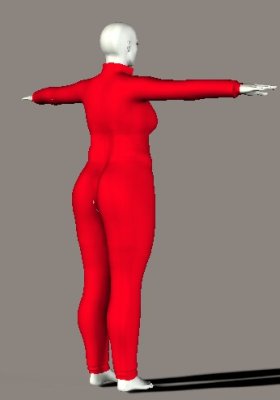
- Now we start with the first morph. Set the dial to 1 and make your inspections.
In my example I found something, that poked through in the 135 ° view.

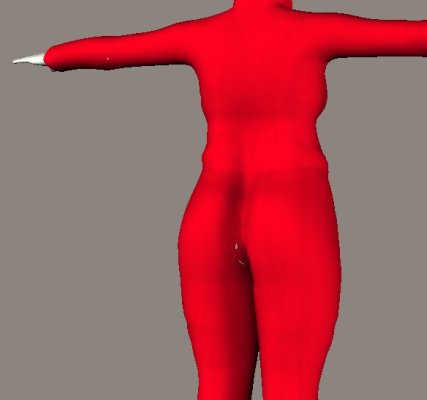
I made a render and it was still there:
So the next step was to move the figure a little bit and go closer with the cam and again a render.
Make a notice about that and save the render. Use a name that is similar to the used morph, e.g. Voluptuous_135.jpg or so. You know now which morph in which view is on the render.
Try also a render with nearly production settings with: Use displacement maps and Raytracing, max texture size = 4096 and so on. Sometimes the pokethroughs disappear with displacement maps. - Some clothes have adjustments for this, sometimes named: Loosen or Adjust.... If this is the case, try the dials and check if the pokethroughs disappear. Depending on the size of the pokethrough I start either with a setting of 1 for the adjustment or with 0.5.
If the pokethrough disappears I try the half of the value, e.g. 0.25 for the next try. If the pokethrough is back again I make a render and if it's gone I try the next half of 0.25 means 0.125.
Using the half of the value between good and bad is the fastest method to find the optimum value, although I would use 0.1 instead of 0.125 and 0.2 instead of 0.175. Makes the thing easier.
Write down your results. - Now check the morphs that usually work together with others like Breastsize together with BreastNatural, BreastDroop, BreastDiameter and so on. You have to do this for each implemented morph but for the breastmorphs you usually need only the frontview, 45 ° and -45 °, but 5 breastmorphs with 3 combinations and 3 views for each combination means additional 45 views in total.
- Next steps are poses. Use some standard poses for the figure to check if there are additional pokethroughs. Usually if you try extreme poses you will find some. Make a note but for sure, this usually can only be fixed by making some bodyparts invisible. Make notes about your findings and save the renders.
- Now the first phase of your test is nearly done. One thing you have to do now is reducing the size of your renders. Use a graphics programme, Irfanview will do the job too, and cut the renders to the necessary.
- Put it all together, your findings, your renders and send it to the creator of the cloth.
- Clean your Test runtime for the next phase of the test. Remove everything, even your errors.txt. The next test should start again from zero. This is the only way to see if the artist had corrected something and distorted something else.
I hope this lttle tut makes it easier for you to run your next tests. Even if you are testing your own stuff, it can help you. But, to be honest, you cannot ensure the correctness of your items if you only tested them by yourself. Some errors, e.g. non-standard pathnames, you will never find as these pathnames are correct on your PC. Unfortunately only on your PC.
If you have any remarks or comments please feel free to contact me at:
Ulli3D @ulliswelt.com
Sorry, no direct mail link due to spam.
Back to Page 2